The Fine Art of Dinner Table Napkins - 1873
Although this Manual is devoted strictly to the folding of Dinner Table Napkins, it must not be concluded that Table Napkins should be used at dinners only, for they are necessary at all meals, be it breakfast, luncheon, or supper. Except on ceremonious occasions, they are for these minor repasts folded simply, and without any elaboration.
General Directions for Folding the Table Napkins
The best size for a Table Napkin is a 26-inch square of damask. All the Table Napkins, for which illustrations follow, with the exception of the “Cardinal's Hat,” require to be squares; but should the napkin not be square, adopt the following plan to make it so.
Lay it open with the shortest side towards you; draw the right-hand top corner down towards the left-hand bottom corner until the edges on the right-hand side of the damask are even. Then fold in the surplus piece.
The laundress should be instructed to use very little if any, starch in getting up the Table Napkins, as it renders the linen harsh and unpleasant. Each napkin should be returned from the wash folded in nine square folds instead of sixteen, as is usually the case.
Great care should be taken to iron table napkins evenly, so as not to draw them out of the square.
Before commencing to fold, the square should be placed flat in front of the folder and the success of the fold depends on the evenness and accuracy with which the creases are made.
Serviettes Include: Marie Louise, Camellia, Twelfth Cake, Wing, Hamburg Arms, Greek Cross, Slipper, Cardinal Hat, Tulip, Prince of Wales’ Feather, Coronal, Swan, Basket, Rosebud, Bridal, Artichoke, Star Fan, and Victoria Regia.
The Marie Louise Table Napkin
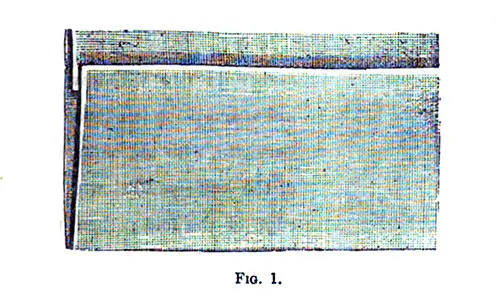
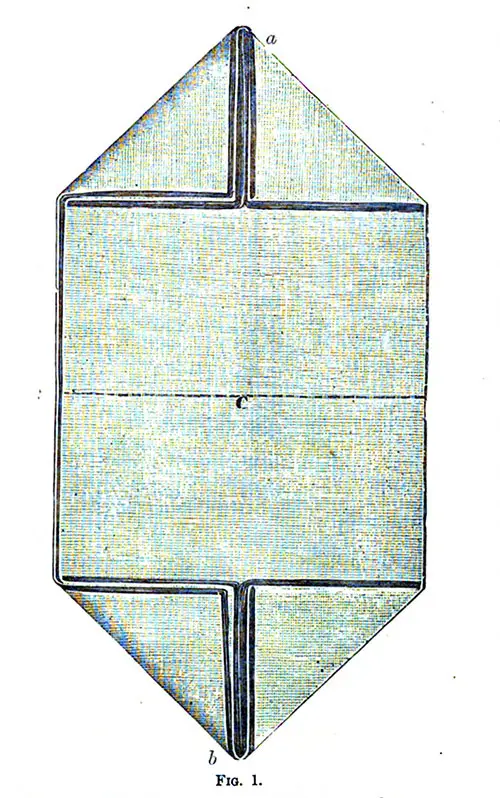
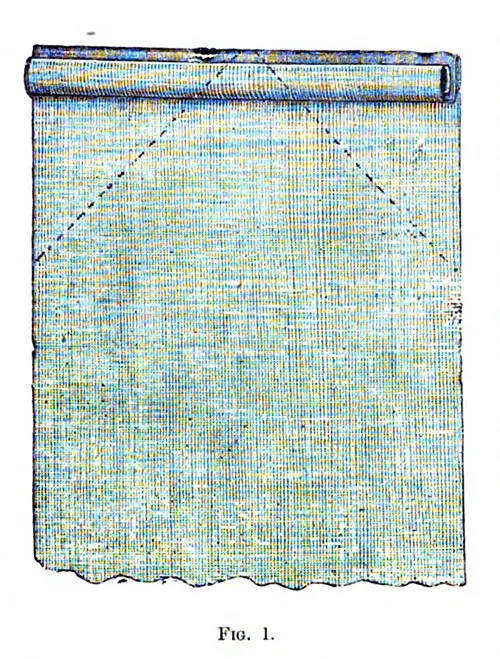
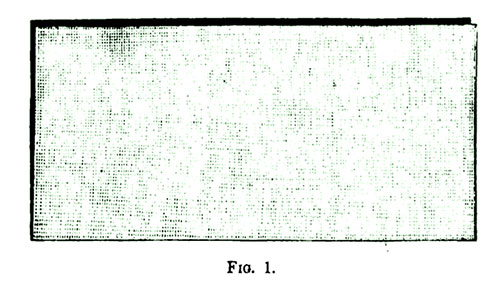
Open the Table Napkin before you; fold it in half, with the edges at the top; plait four or five inches of the damask upwards to within an inch of the top, as described in Fig. 1;

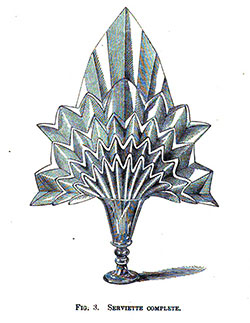
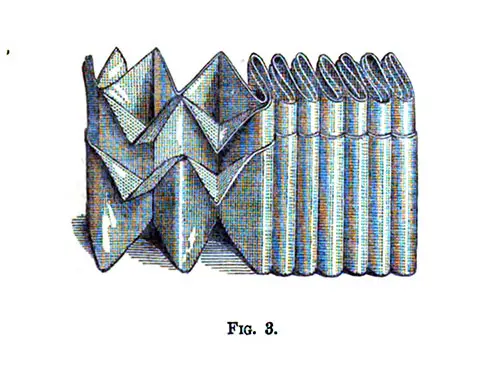
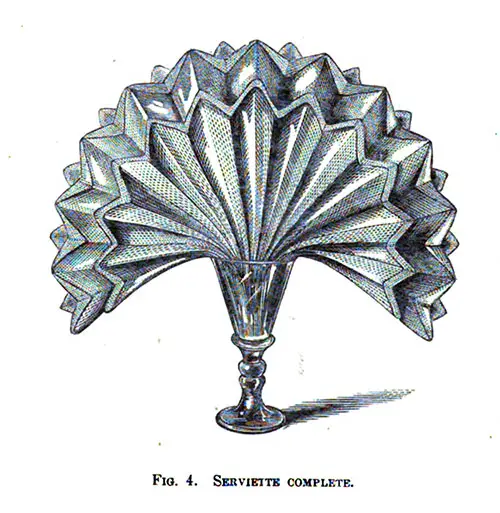
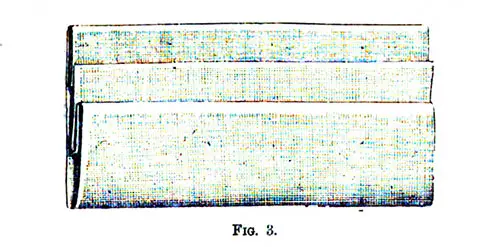
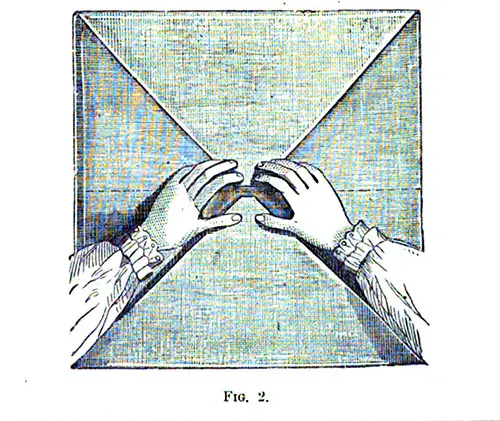
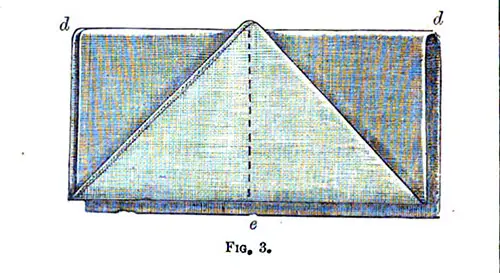
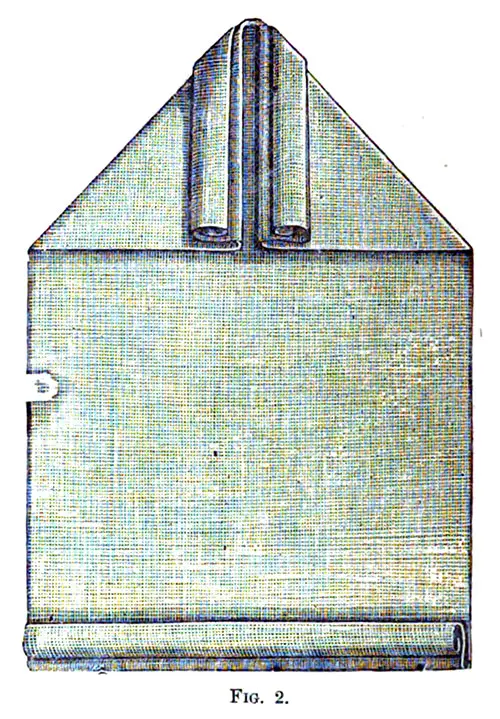
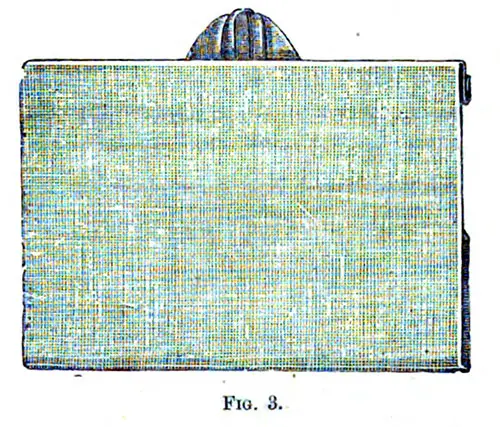
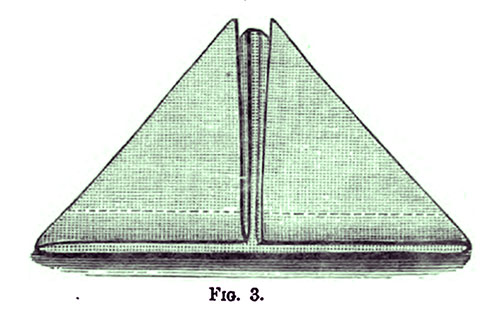
Turn the Table Napkin over and make a similar plait on this side (see Fig. 2); plait this up crossways in the manner of a closed fan, and with the finger and thumb draw out the points between the folds, as described on the left-hand side of Fig. 3
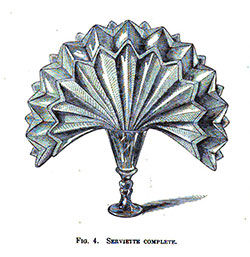
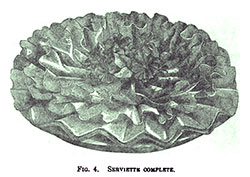
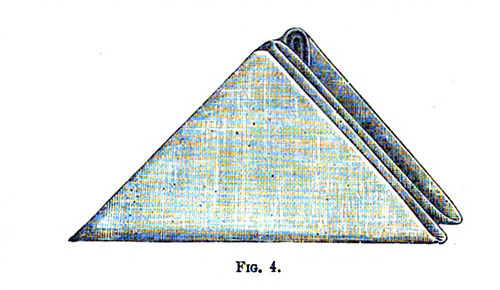
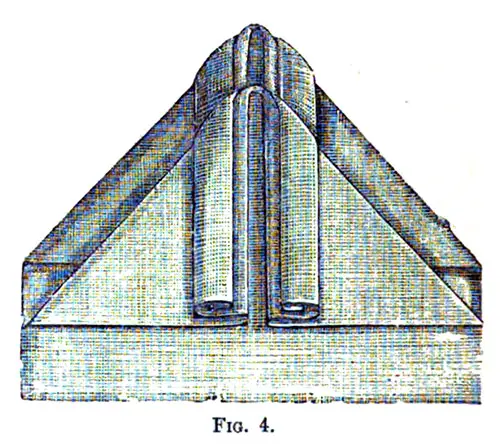
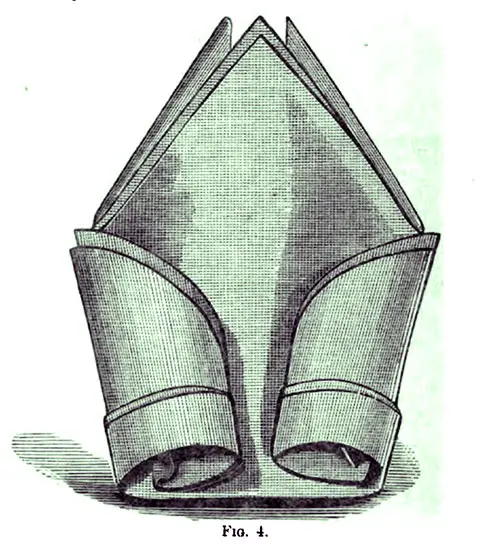
Place the lower part of the fan in a wine glass or Table Napkin ring; it will then assume the appearance represented in Fig. 4.
The Camellia Table Napkin
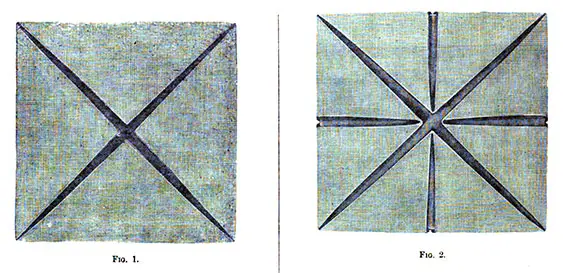
Fold into the center the four corners as in Fig. 1; repeat this for the second time, and again for the third time. You now turn the Table Napkin over and turn the corners into the center in the same manner as before. Fig. 2 is then complete.
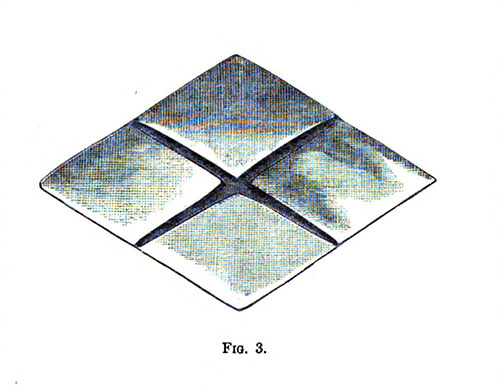
The Table Napkin being turned over will assume the appearance of Fig. 3.
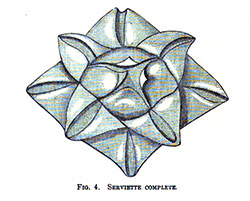
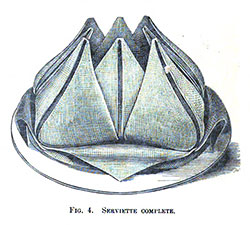
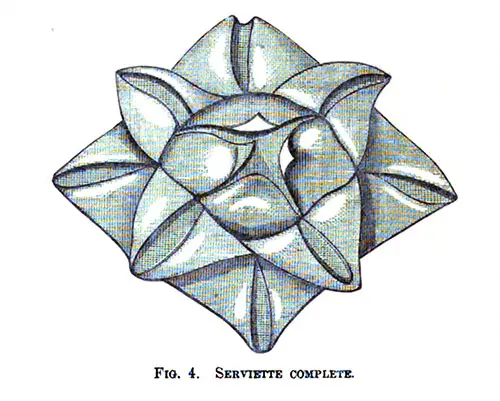
The corners must this time be folded underneath the Table Napkin to the center, and the upper center points drawn back in the manner represented in engraving Fig. 4, which completes the Camellia Table Napkin.
The Twelfth Cake Table Napkin
Fold down the top of this Table Napkin three inches; fold upwards the bottom edge to meet it, or rather one inch above it (see Fig. 1).
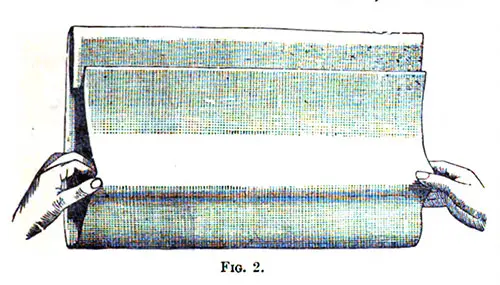
Place the hands as in Fig. 2, and make a third fold upwards, the result will be Fig. 3.
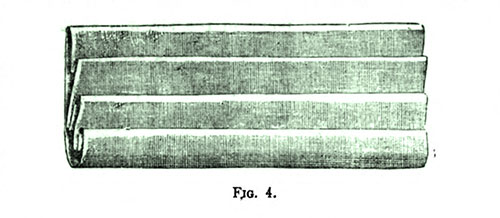
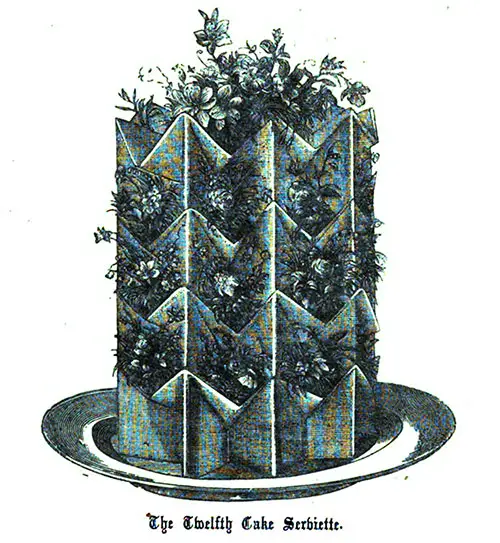
Lastly, make the fourth fold upwards from the bottom edge (see Fig. 4). Turn one end towards you and crease it backwards and forwards in eight regular two-inch folds. Now, hold it on the side with the left hand, and with right finger and thumb crease down the plaits between the folds into vandykes (see Fig. 5).
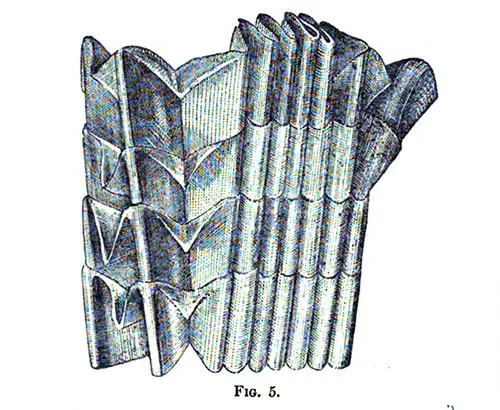
Stand it upright on its heaviest end and form it round. If for a supper party or wedding breakfast, decorate with flowers.
The Wing Table Napkin
Fold the Table Napkin in half and again in a quarter. Fold both ends to meet in the center, as is represented by letter b in Fig. 1. The open edges must be at the top, the folded portion below. Turn the upper corners down to letter c, in Fig. 2, creasing them as represented by the black lines.
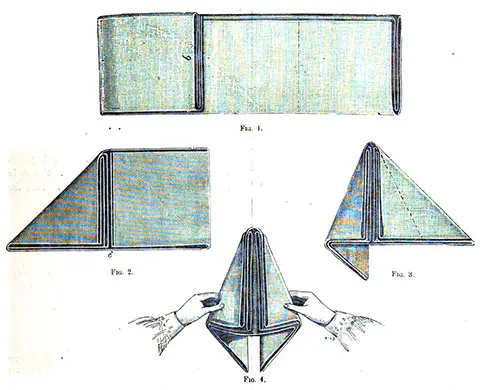
Fold the left-hand side partially under (see Fig. 3); repeat this with right side from the black line. Stand the Table Napkin upright, and with both hands separate the folds at the top. Crease the lower points well down, or the Table Napkin will not stand upright.
The Hamburg Arms Table Napkin
Fold the Table Napkin in half, fold down the corners by letters a and b; c shows the center, the line being simply creased (see Fig. 1).
Fold the points a and b to c in the center (see Fig. 2).
Double in half, with points outside (see Fig. 3).
Fold the sides towards the center, so that the d’s meet the e in the center (see Fig. 4).
Take the top point, and turn downwards the triangular figure (see Fig. 5)
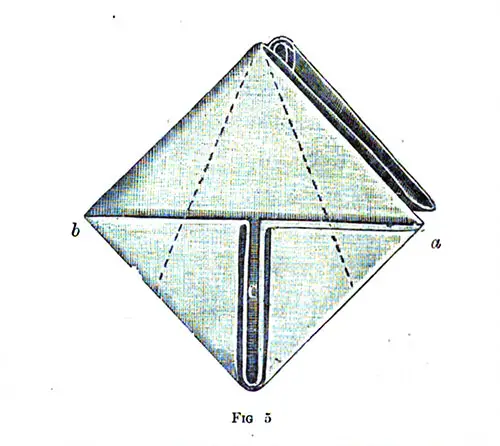
Then fold towards the center the upper parts indicated by a, b, and the black lines, and this completes Fig. 6.
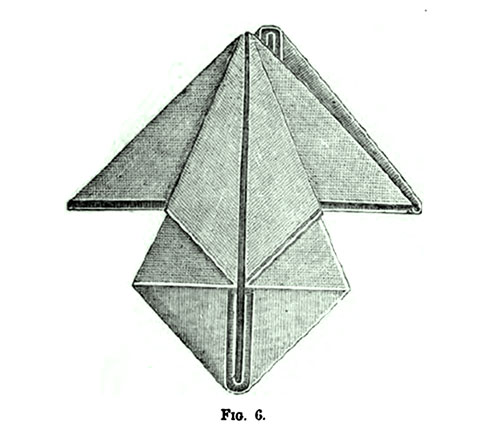
Turn the Table Napkin, and, after folding back the upper portion, repeat the same operation (see Fig. 7).
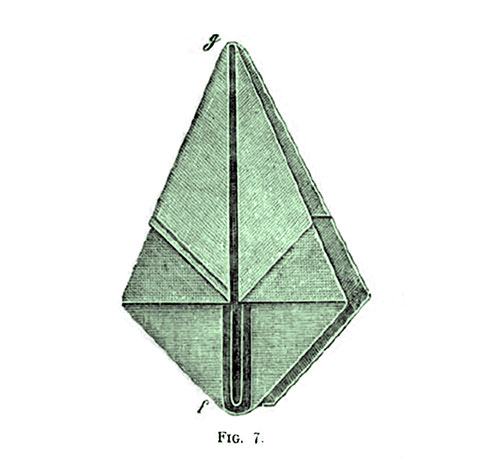
Raise the lower point marked f, and fold it upwards to g (see Fig. 8).
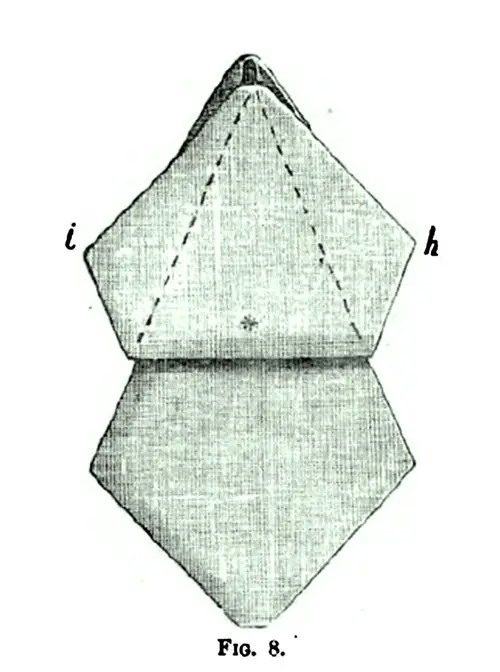
Crease down the Table Napkin, as shown by the broken lines; the letters h and i will then meet at the asterisk in the center. Fold the lower portion of the Table Napkin under the top portion (see Fig. 9).
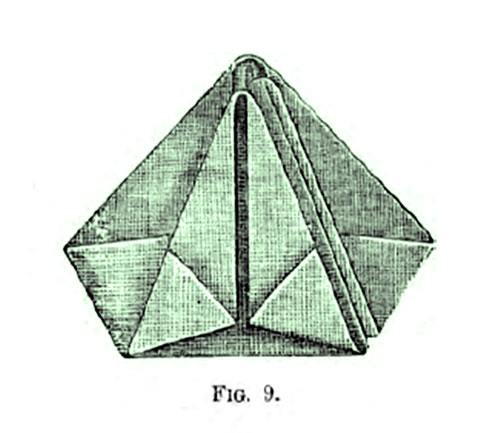
Turn the Table Napkin, and fold the side points into the center, in the same manner as in Fig. 8.

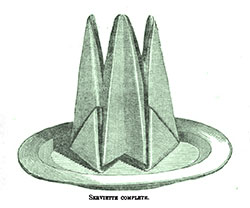
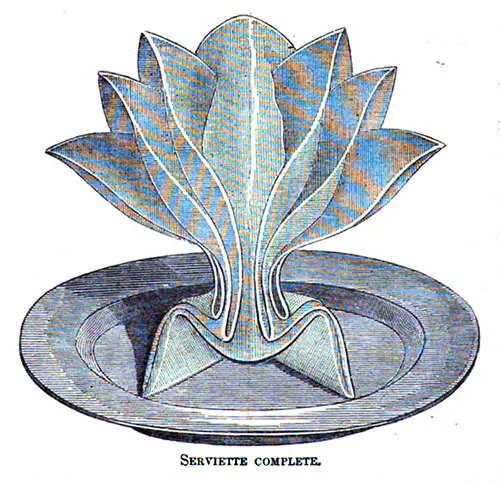
Stand the Table Napkin upright on the plate, drawing the lower part well out, and place the bread underneath the center.
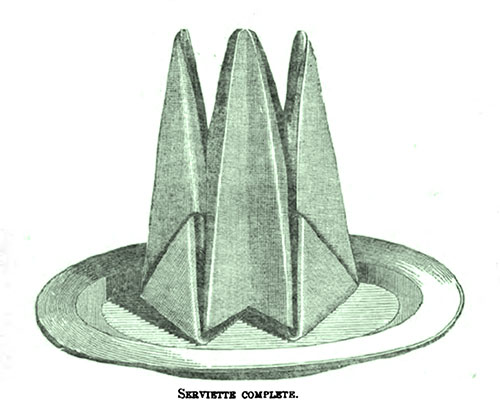
The Hamburg Arms Table Napkin Complete
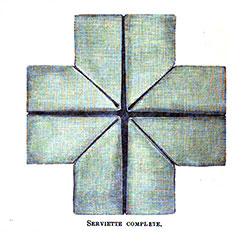
The Greek Cross Table Napkin
Fold the four corners into the center (see Fig. 1).
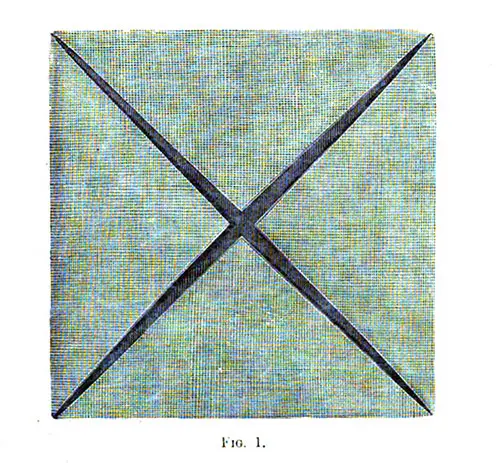
Then fold the corners again into the center. Turn the Table Napkin over and fold the corners into the middle a third time. Turn the Table Napkin over, and fold in the corners the fourth time (see Fig. 2).
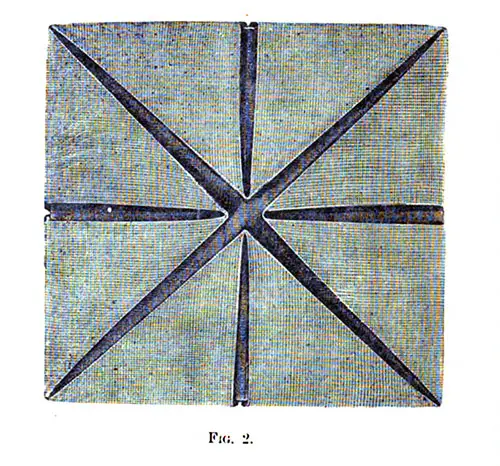
Turn the Table Napkin over, (see Fig. 3);
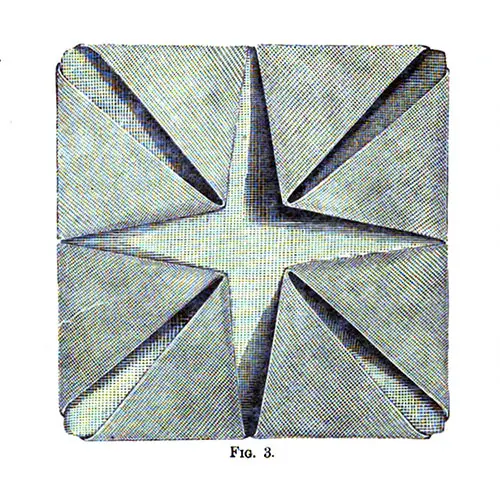
Fold back the four points as one point is represented in Fig. 4.
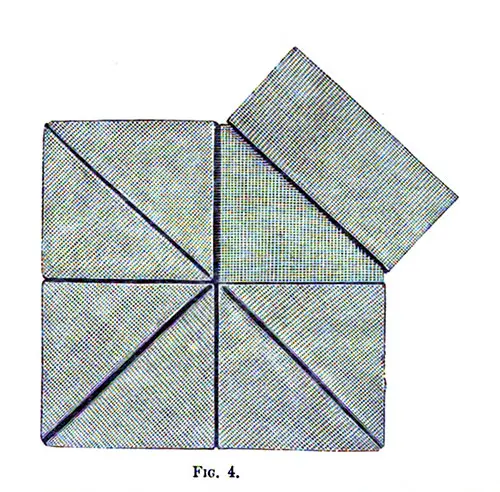
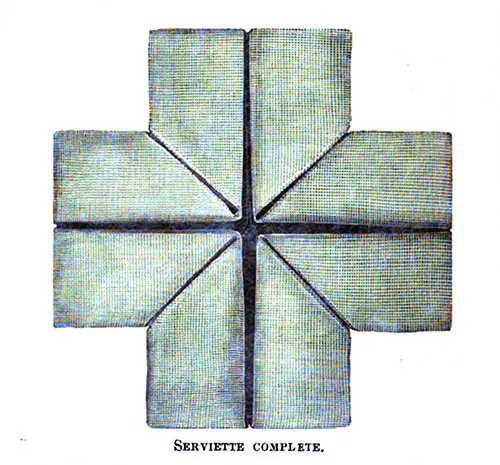
Turn the Table Napkin over, and it is in the form of a Greek cross.
The Slipper Table Napkin
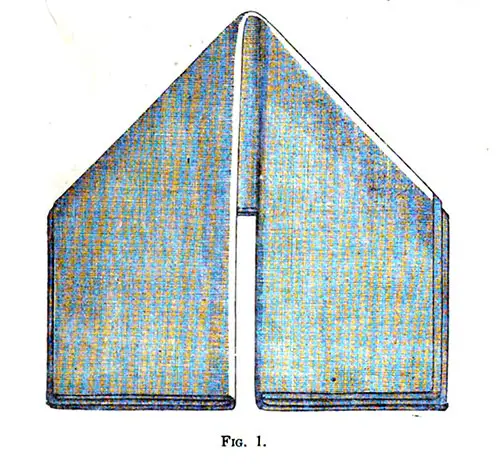
Fold the damask in half, and again in a quarter; fold the ends down towards you, leaving the center in a point (see Fig. 1).
Turn back the inner corners from the bottom (see Fig. 2).
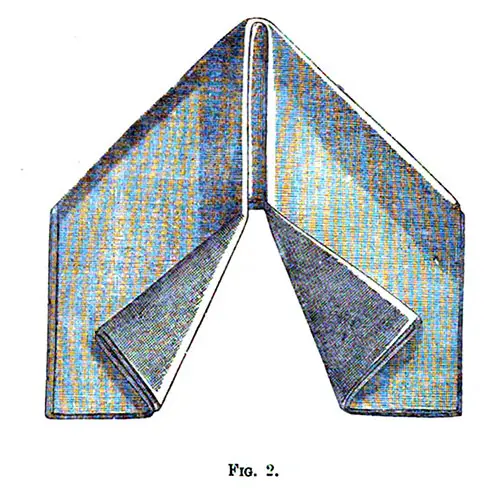
Turn the same corners over twice in the same direction (see Fig. 3).
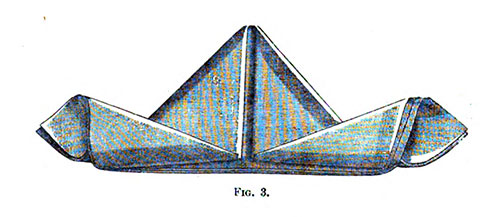
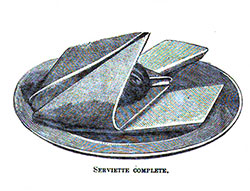
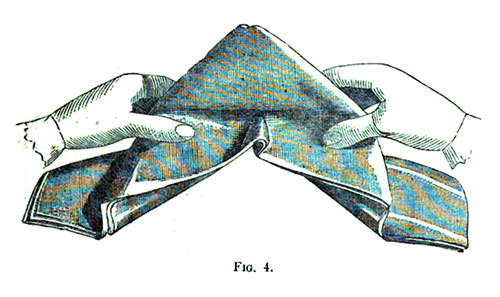
Turn the Table Napkin round with the center point towards you, hold it well with both hands (see Fig. 4), join the ends together under the center point.
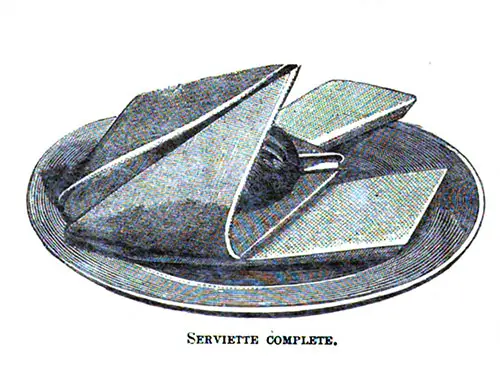
The Slipper Table Napkin Complete appears below
The Cardinal Hat Table Napkin
For this design the Table Napkin should be half as long again as it is broad; if, however, your Table Napkin is square, fold under one third of it. Fold the top down three inches, then fold the edges upwards one inch, and again an other fold upwards, to within half an inch of the top (see Fig. 1).
Turn the Table Napkin over, and crease down the corners, according to the broken black lines (Fig. 1). Fold the bottom edge three inches upwards, downwards one inch, and again half an inch in the same direction (see Fig. 2).
Fold the lower half of the Table Napkin upwards to within an inch of the top (see Fig. 3).
Crease the corners downwards, as in Fig. 4.
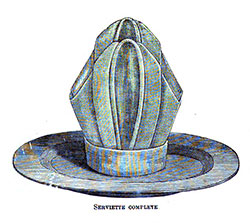
Fold the bottom of the Table Napkin upwards, to form the band of the hat; hold with both hands (see Fig. 5), form the band round, and tuck the right end into the folds of the band.
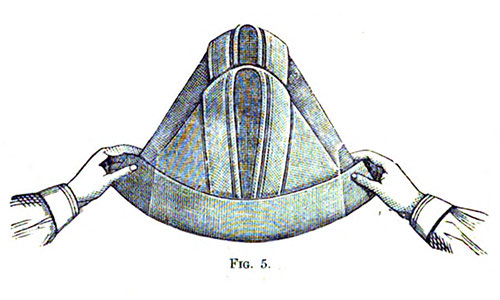
Open the hat, to make it stand firmly.
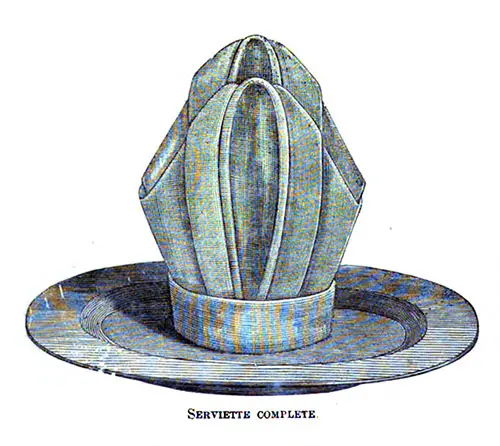
The Tulip Table Napkin
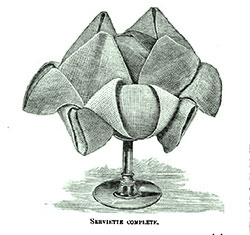
Commence Fig. 1 by folding the four corners into the center evenly. Again, fold the outside corners into the center as before, and press down each fold. Turn the corners into the center for the third time, then once more—thus completing the fourth time.
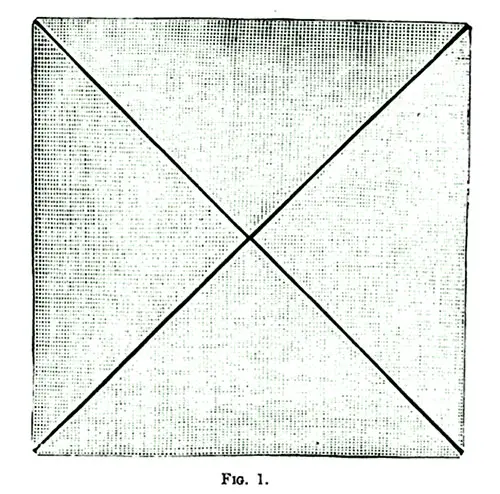
Turn the Table Napkin over, and again fold the outside corners into the center. Turn the Table Napkin over again (see Fig. 2).
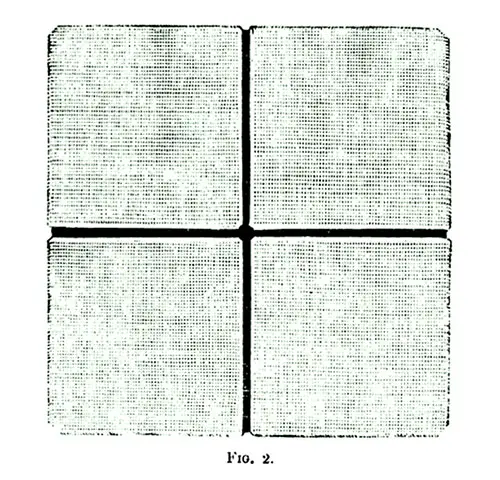
With the fore-finger and thumb of the right hand, turn separately each of the four centers backwards, over the outside corners, as illustrated in diagram No. 3.
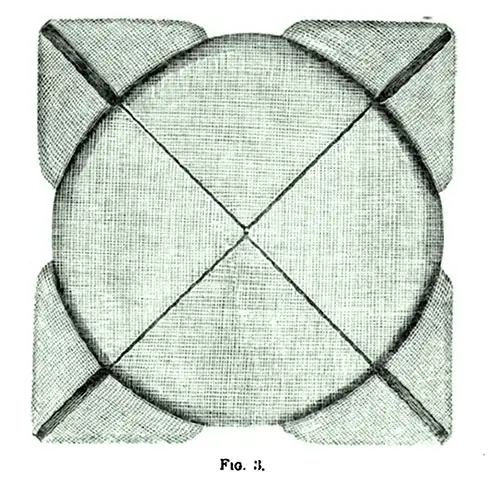
Take the next four points from the center and draw them back in the same manner; repeat this with the four remaining points; when they will fall to the position illustrated in Fig. 4. By drawing down the two sets of points, the center will become slightly raised.
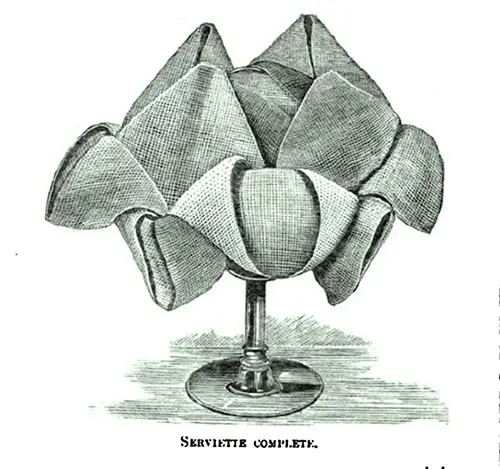
The Tulip Table Napkin Complete
The Prince of Wales' Feather Table Napkin
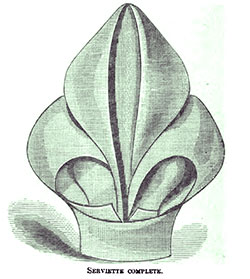
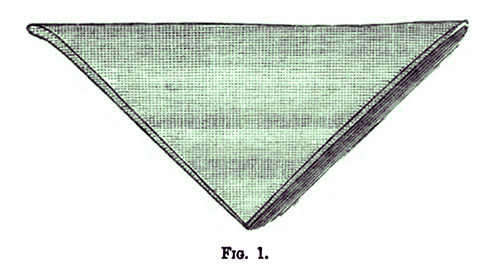
Lay the damask open, with one corner pointing towards you; then bring down the top corner to meet it, as shown in Fig. 1.
Fold down the points at the side to meet the same corner, in the manner of Fig. 2.
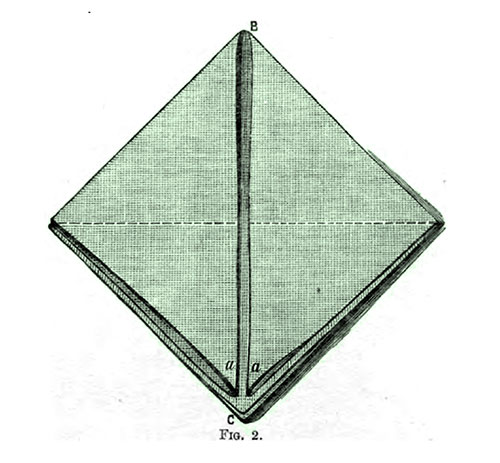
Now fold the points marked a upwards to corner b ; the remaining corners, marked c, must be turned under backwards to meet b, at the top; this completes Fig. 3.
Fold upwards one inch and a half of the damask to the part indicated by the broken lines in Fig. 3 and turn the Table Napkin over. Now roll inwards the points at the side towards the center, as described in Fig. 4.
Again, turn the Table Napkin over, draw downwards the single points from the top, and place the tips between the folds of the band. Stand the Table Napkin upright as in the illustration, which shows it complete.
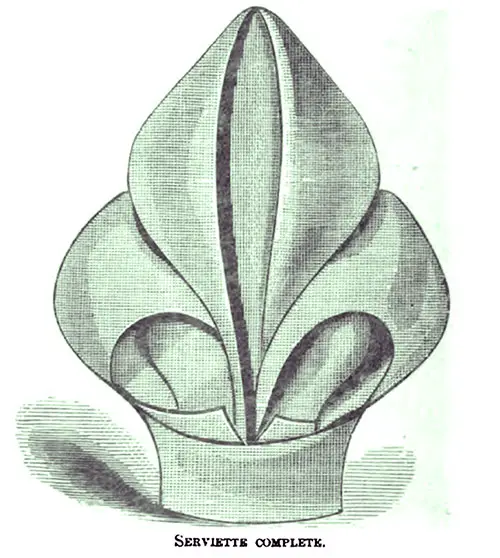
The Prince of Wales' Feather Table Napkin Complete
The Coronal Table Napkin
Commence by folding the bottom edge upwards to within half an inch of the top edge (see Fig. 1). Now make a succession of seven even plaits with the upper portion of the damask, taking about two inches of the damask for each plait and always folding upwards, commencing at the top.
Observe the left-hand side of the Table Napkin in Fig. 2 for the proportion of plaits. Take a paper knife three-quarters of an inch in width, place it across the center of the plaited Table Napkin, and then fold the left side of the Table Napkin over the knife; draw out the knife, and place it on the outside; now fold backwards and forwards, drawing out and replacing the knife as each plait is formed. When the left side is completed, plait up the remaining half in the same manner.
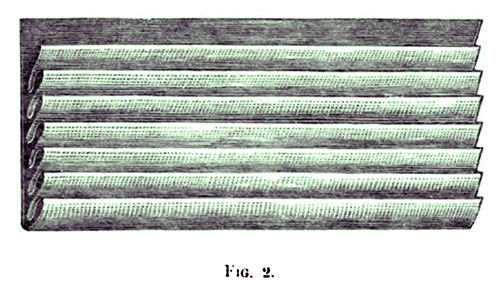
The folds must now be pressed together so as to crease them firmly, and the forefinger of the right hand inserted into the lowest plait of the seven, which it creases backwards so as to form a Vandyke.
Continue this with the plaits in succession until you arrive at the top. Repeat similar creases between every fold until all are finished. This done, take the Table Napkin in both hands, spread it round in the form of a, coronal, as shown in the illustration (Fig. 3), and the Table Napkin is complete.
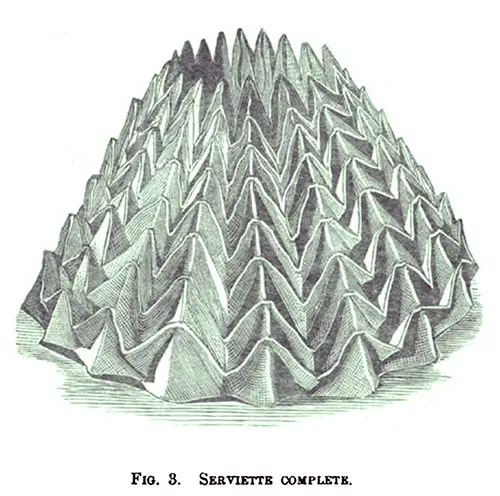
Fig. 3 - The Coronal Table Napkin Complete
The Swan Table Napkin
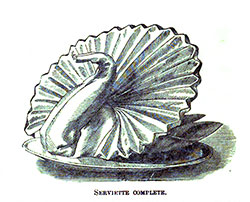
Crimp up one end of the damask in the manner of a fan; then fold under the other end to meet the bottom of it; then take the left side of the Table Napkin, and roll inwards to the center of the fan;
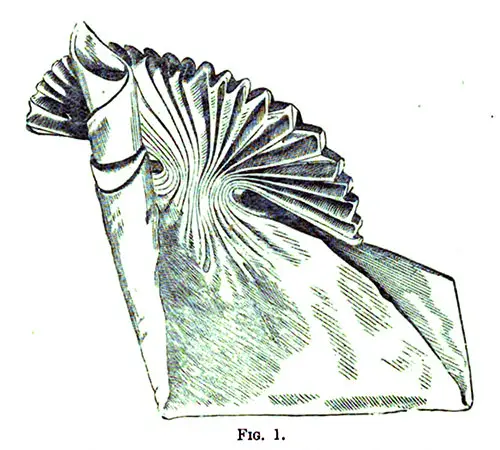
Repeat this on the right-hand side; turn the Table Napkin over, and bend into shape the part forming the head and neck of the swan ; this completes the Table Napkin.
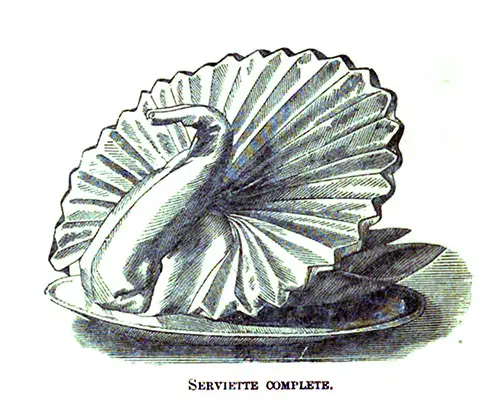
The Basket Table Napkin
Fold the Table Napkin in three thicknesses. Then turn back a single, thickness about the width of one inch, and fold over the same piece of the damask the width of an inch and a half in the same direction (see Fig. 1).
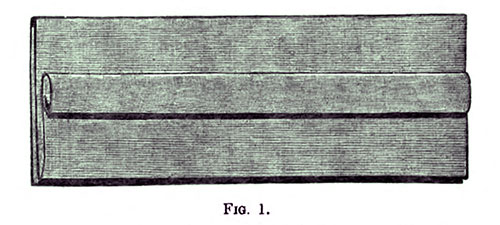
Turn over the Table Napkin, and fold one-sixth of the length down. This being again folded over in the same direction, Fig. 2 will be the result.
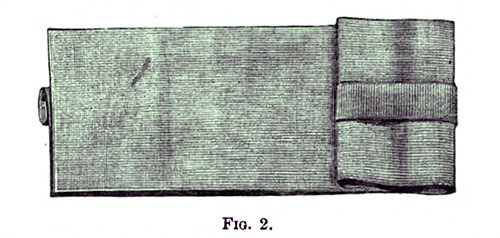
The remaining portion of the napkin must be folded backwards and forwards beneath the last fold, as in Fig. 3.
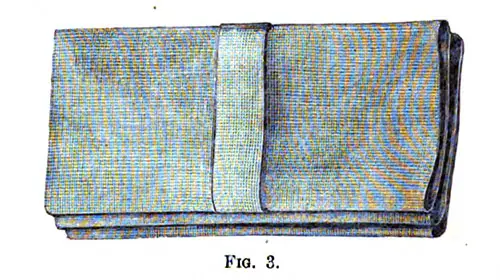
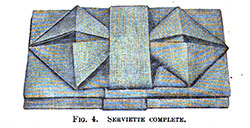
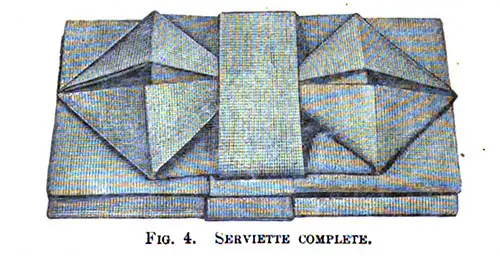
The center of the upper layer of the napkin will then have to be drawn down, and placed beneath the band (or rather plait) in the center of the Table Napkin, and this repeated at the other extremity will have the appearance as shown in Fig. 4.
The Rosebud Table Napkin
Commence Fig. 1 by folding the four corners into the center evenly. Again, fold the outside corners into the center as before, and press down each fold—as success depends on the precision observed.
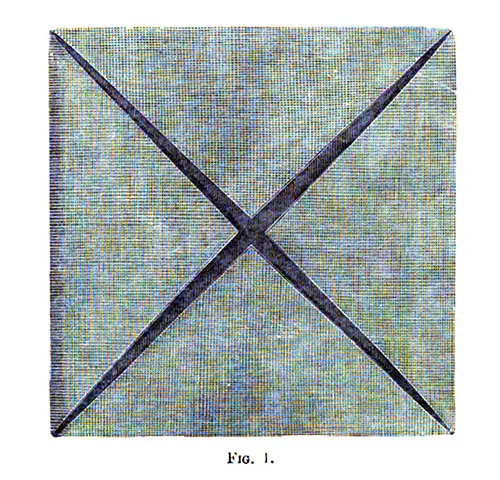
Turn the corners into the center for the third time; then turn the Table Napkin over, and again turn the corners in as before; then, by turning the Table Napkin over, Fig. 2 will be the result.
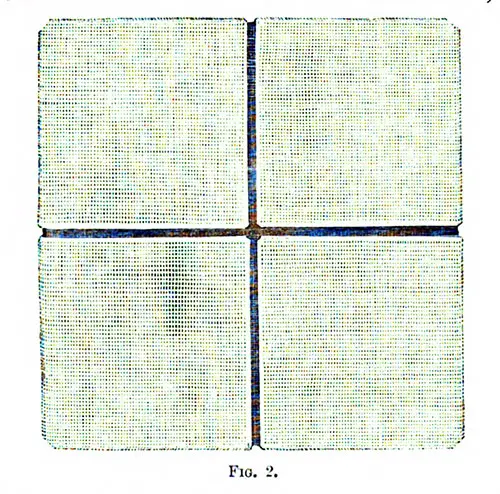
You now turn the Table Napkin back again and place the left hand upon the points in the center; then carefully draw out each point from underneath an inch beyond each corner, being careful to keep a finger of the left hand upon the corner while you are drawing the point out. Fig. 3 will now be completed.
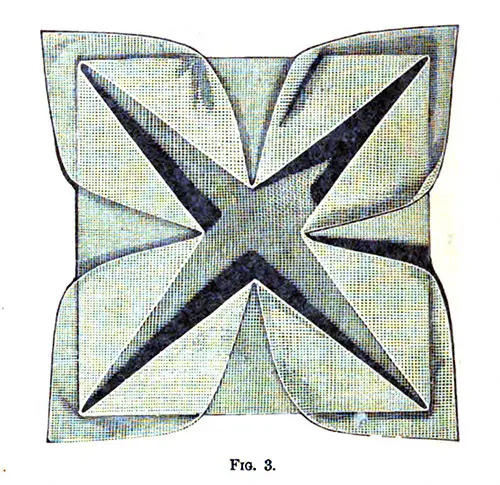
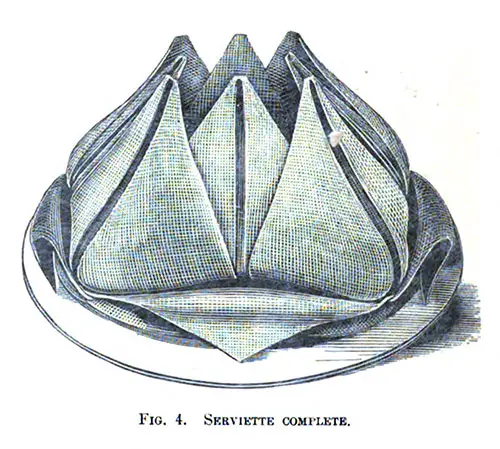
Proceed to draw the next four corners from underneath upwards over your left hand ; and finally, the last four corners must be drawn out, and these are turned back half-way, as illustrated in the engraving (Fig. 4) which represents the Table Napkin complete.
The Bridal Table Napkin
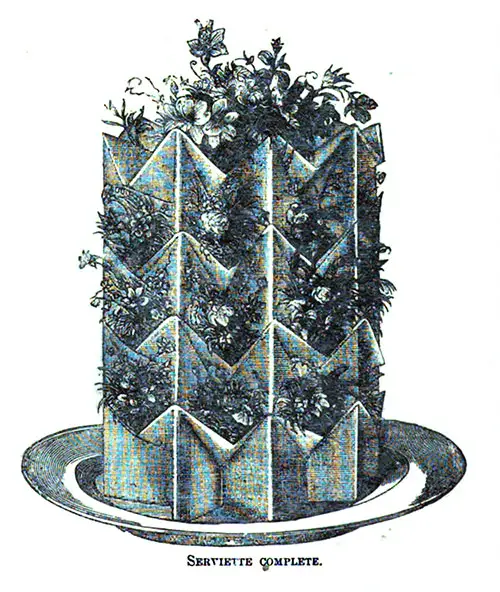
This form of Table Napkin is becoming the favorite one for wedding breakfasts. The plan pursued—and it is a very effective one—is to decorate the top of every Table Napkin with a bouquet of flowers.
Those intended for the bride and bridegroom are entirely composed of orange flowers and stephanotis, those for the bridal party (bridesmaids, groomsmen, etc.), with white roses and whatever other white flowers may be in season, and the remainder of the guests to be provided with scarlet flowers — geraniums, verbenas, etc.
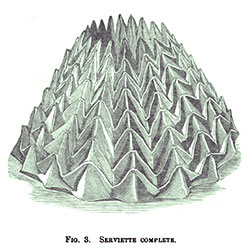
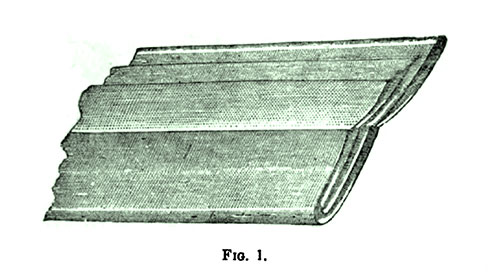
Lay out the napkin in its full size, fold it within an inch and a half at the top; take hold of the two ends, one in either hand, and fold it back again to within an inch and a half of the line of the Table Napkin which has been creased down, and which now becomes the top. By this time, the damask will] have assumed the form shown in Fig. 1.
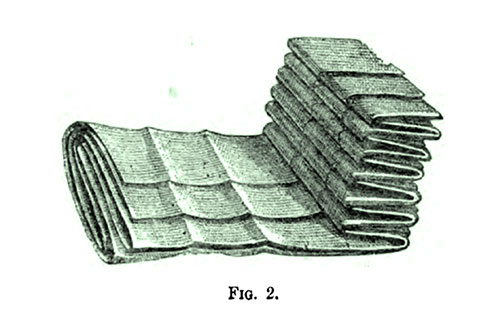
To continue, fold this form in half, so that the steps of damask should be on the outside, then lay it flat and fold it down in nine well-defined plaits, each of which must be strongly marked or pressed down with the fingers. This process is shown in Fig. 2.
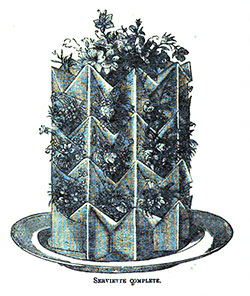
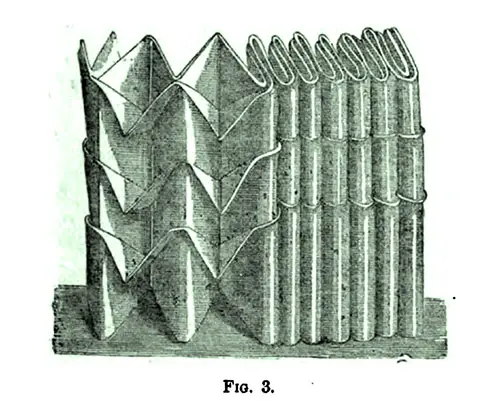
Hold the plaited damask firmly between the finger and thumb of the left hand, and with the right-hand crease down the folds or steps of damask to a point between every plait, commencing at the top; there will be three tiers of these pointed creases, which should face downwards (as in Fig. 3).
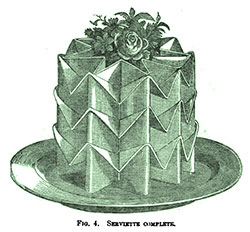
Now bring the sides together to form the damask into a round, decorate the top with flowers, as described above, and the Table Napkin is complete, as shown in Fig. 4.
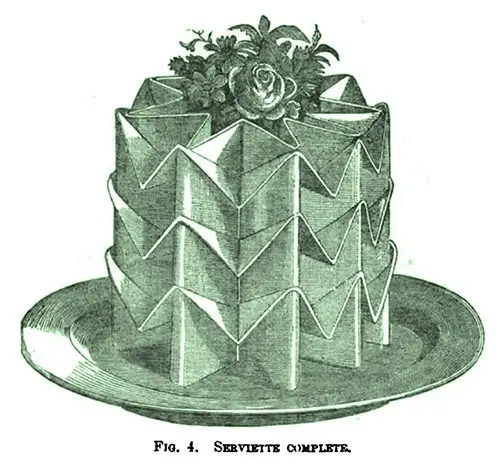
The Bridal Table Napkin Complete
The Artichoke Table Napkin
Fold the four corners into the center; fold them again a second time, and again a third time.
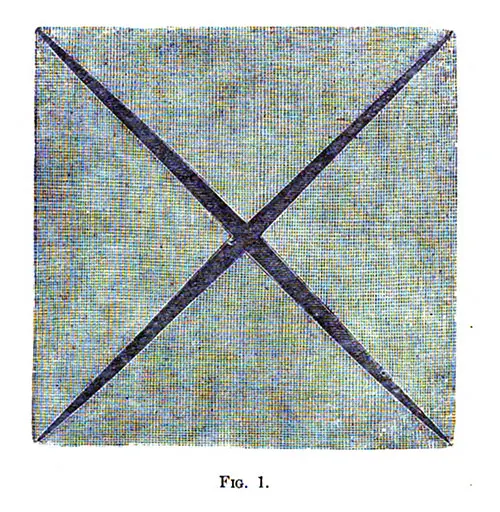
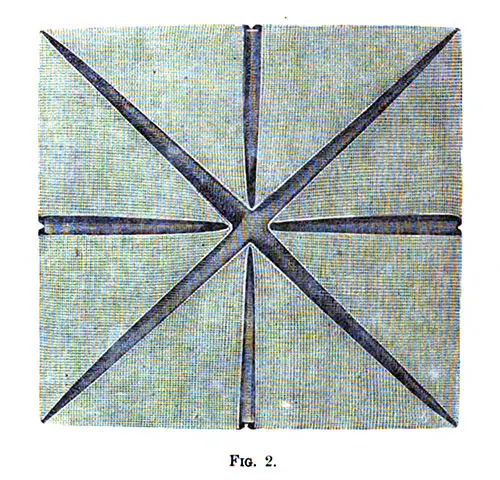
Turn the Table Napkin and fold the corners into the center a fourth time (see Fig. 2).
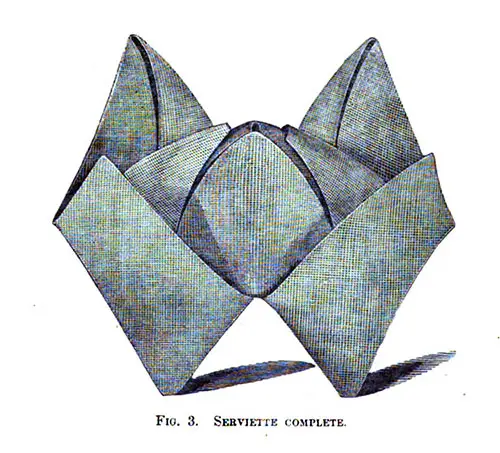
Turn the Table Napkin over back again, and partially bend under the four corners, so that it may rest on them (see Fig. 3).
The Star Fan Table Napkin
Lay the Table Napkin open before you and commence by folding the two top corners into the centre, crease them well down, and then turn them back in the manner described in the foregoing illustration (see Fig. 1).
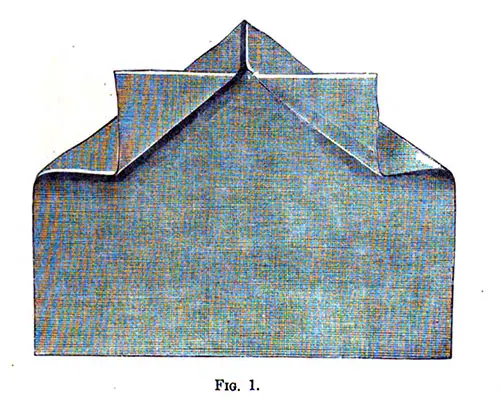
This having been carefully done, the next thing necessary is to make three plaits upwards towards the top (see Fig. 2). The plaits should be about an inch apart.
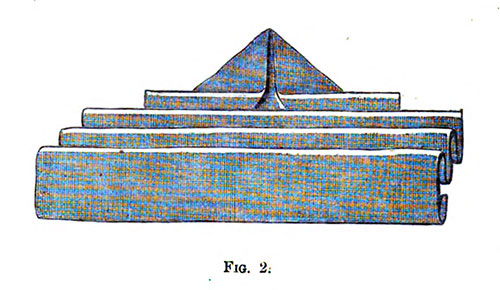
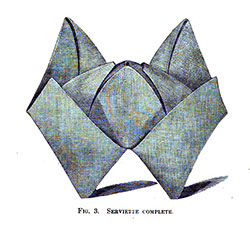
Now proceed to plait the whole up crossways, somewhat in the manner of a closed fan, and afterwards draw out each of the points between the separate folds, as is shown in the accompanying illustration (Fig. 3).
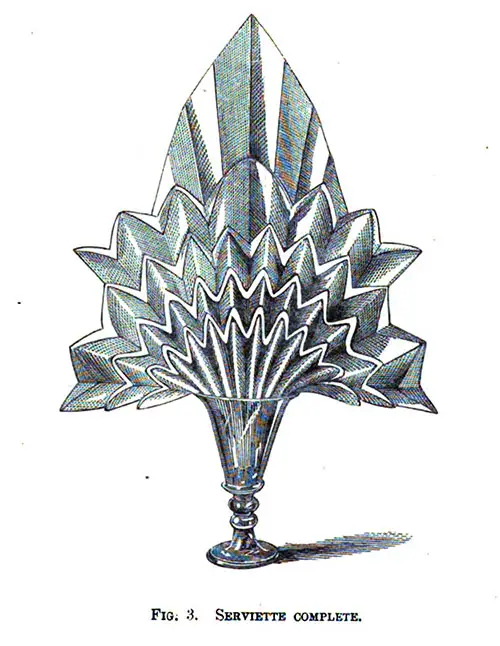
In order to complete the Table Napkin the lower part of it should be placed in a wineglass, when it will have a very pretty effect, assuming the appearance of an open fan or a semi-star.
The Victoria Regia Table Napkin
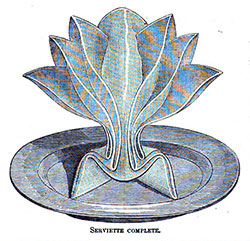
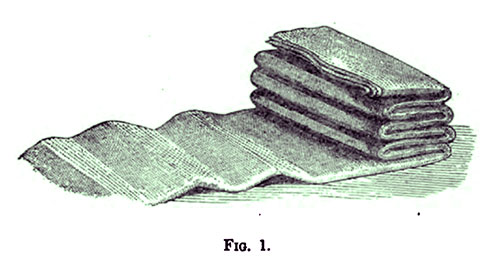
Lay the Table Napkin open before you, and fold it in half; fold it again, and repeat the process once more, and you will have eight folds under your hands. Commence plaiting backwards and forwards, as shown in Fig. 1, and measure so that the length may take not less than ten folds of equal size.
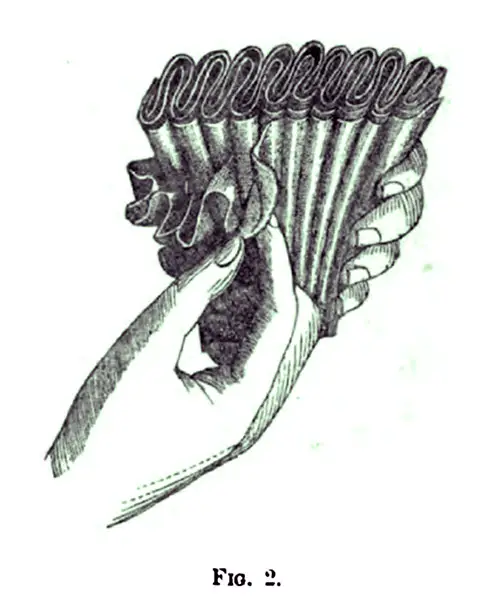
Impress these folds well by stroking them heavily, then take the Table Napkin in the left hand (as shown in Fig. 2), and pull out the plaits one at a time with the right hand.
When the two first single edges of the damask have been pulled out evenly, the Table Napkin assumes the form as in Fig. 3
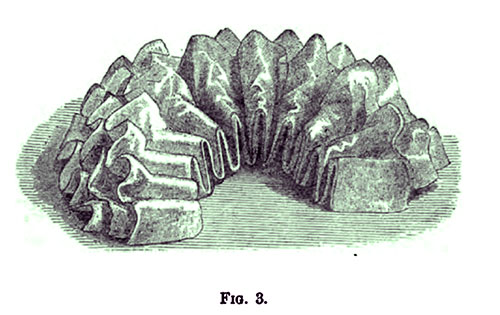
To conclude, lay it thus folded on the dinner table, pull it round to form a circle, and decorate it with tiny bouquets of small flowers (see Fig. 4), and the Table Napkin is complete.
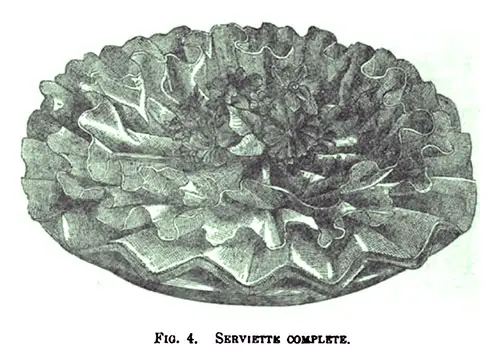
Fig. 4 Table Napkin Complete
The Book of Dinner Table Napkins, Third Edition, London: Horace Cox, 1872

